There’s something about Halloween that brings out the creative kid in all of us—but when life is busy, even the simplest traditions can feel overwhelming. If you’ve ever wanted to show up with something festive but just didn’t have the time (or energy) to bake from scratch, you’re not alone.
These no-bake Halloween treats are for the moments when you want to feel part of the fun without adding more to your plate. They’re playful, crowd-pleasing, and come together with ingredients you likely already have. No oven. No stress. Just simple, spooky treats that help you join in the celebration—on your terms.
Let’s take the stress out of Halloween treat-making with these creative, crowd-pleasing no-bake ideas! They’re easy to make, budget-friendly, and kid-approved—ideal for class parties, spooky movie nights, or hands-on fun at home.
Read my full disclosure here if you’d like the details.
Why Choose No-Bake Halloween Treats?
No-bake Halloween treats are the easiest way to add something festive without the fuss. There’s no oven to preheat, no timers to watch, and no long ingredient lists to manage. Most come together quickly with simple pantry staples—and they’re just as fun and eye-catching as baked goods.
Whether you’re prepping for a party, filling treat bags, or need a last-minute idea that still looks impressive, these recipes deliver. They’re perfect for busy schedules, low-energy days, or when you want something creative without committing to a full baking project.
PIN IT FOR LATER TO YOUR FAVORITE PINTEREST BOARD
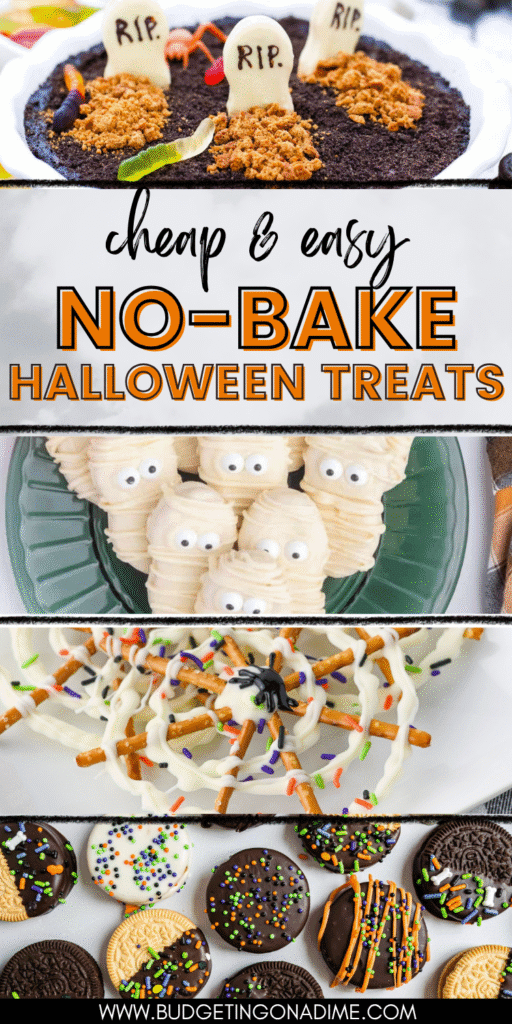
Creepy Crawly Critters No-Bake Halloween Treats
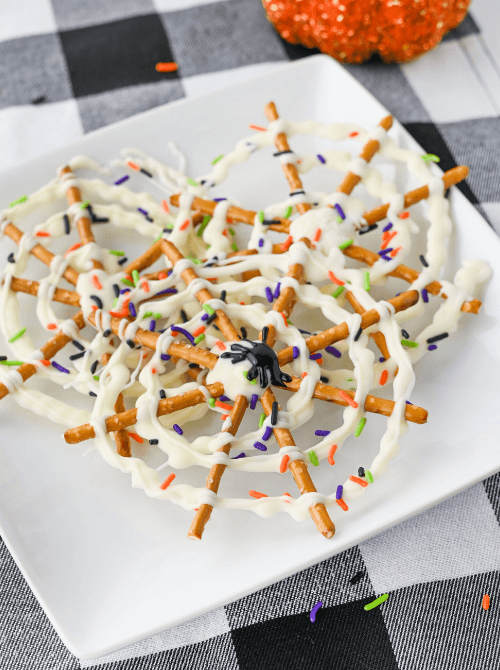
No‑Bake | Salty‑Sweet | Party‑Perfect
These spooky spider web pretzels are a fun fusion of salty pretzel sticks and creamy white candy melts, piped into spider‑web shapes and sprinkled with festive Halloween decor. They require zero baking—just assembly and chill time! Plus, the sweet-and-salty combo appeals to both kids and adults alike.
- What makes this recipe unique?
This treat stands out because of its web design piped over pretzels, creating a dramatic Halloween visual while using minimal ingredients. - How easy is this to make?
Super simple—no oven, just melt candy melts, arrange pretzels, pipe the web, sprinkle, and refrigerate. Great for kids to help with adult supervision. - How much does it cost to make?
Approximately $6–8 for around 10 webs, assuming store-brand pretzels and sprinkles. Using bulk pretzels and pantry stash can reduce cost. - How many servings does this make?
Yields about 10 spider web pretzels, perfect for a small gathering or party favor packs. - Can I customize or swap ingredients based on allergies or taste?
Yes! Use gluten‑free pretzels if needed, swap candy melts for white chocolate or almond bark, and choose vegan-friendly or dye-free sprinkles if needed. Vegan icing pens work for the spider detail.
Quick Callouts
- ✴️Salty sweet combo kids and adults love
- ✴️Easily allergy friendly with ingredient swaps
- ✴️Visually festive with minimal effort
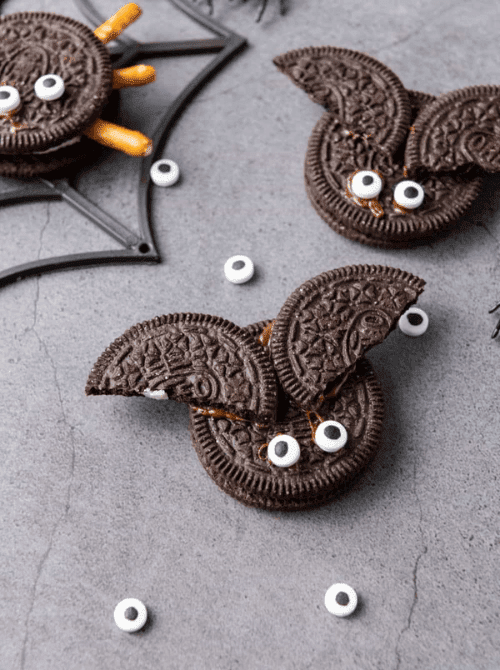
No‑Bake | Cute‑and‑Creepy | Class‑Party Favorite
These Oreo cookie spiders and bats are a spooky Halloween delight made with just a handful of simple ingredients. Kids will love assembling legs and eyes—and there’s no baking involved.
- What makes this recipe unique?
You get two themed treats from one base recipe—spiders using pretzel legs and bats from extra Oreo halves—with custom faces and candy eyes. - How easy is this to make?
Super easy—just melt chocolate chips, stick on pretzel legs and candy eyes. No oven, no fuss—perfect for kids or beginners. - How much does it cost to make?
About $7–9 for 12 treats using store-brand cookies, pretzels, and candy eyes. Buying in bulk lowers the price significantly. - How many servings does this make?
Yields about 12 spiders and/or bats. Great for small groups, treat bags, or classroom snacks. - Can I customize or swap ingredients based on allergies or taste?
Absolutely. Use gluten-free Oreos or pretzels, vegan or dye-free candy eyes, or swap pretzels for black licorice or chocolate Pocky sticks. You can use dark, milk, or white chocolate for coating.
Quick Callouts
- ✴️Two fun Halloween shapes—spider + bat—from one recipe
- ✴️Easily allergy- or vegan-adaptable
- ✴️Charming, kid-made look that’s party-ready
Ghostly and Ghoulish No-Bake Halloween Treats
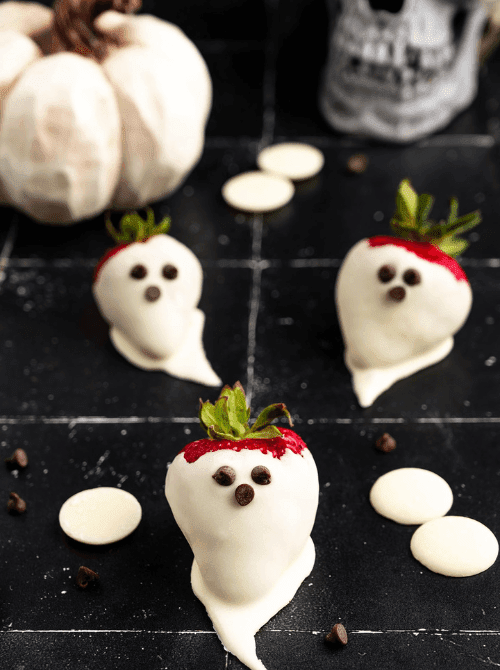
Ghostly & Ghoulish | Light & Fruity | Kid-Friendly
These strawberry ghosts are a fresh, no-bake Halloween treat made by dipping halved strawberries in white chocolate and adding tiny details for faces. They’re cool, creamy, and just sweet enough without being overwhelming. Ideal for warm-weather gatherings or school snack tables.
- What makes this recipe unique?
It uses fresh fruit (strawberries) as the base, offering a lighter Halloween option with fruit and chocolate instead of cookies. - How easy is this to make?
Extremely easy—just dip strawberries in melted white chocolate, pop them on parchment, and add eyes with melted dark chocolate. Perfect for beginners or little helpers. - How much does it cost to make?
Approximately $6–7 for about 20–24 halves depending on berry prices; use frozen strawberries to save money (just thaw first). - How many servings does this make?
Yields about 20–24 ghost strawberries, enough for small gatherings or treat trays. - Can I customize or swap ingredients based on allergies or taste?
Yes—use dairy-free white chocolate or vegan melts, dye-free sprinkles for faces, and try other fruit like banana slices for variation.
Quick Callouts
- ✴️Fruit-based, lighter Halloween option
- ✴️Fresh strawberry flavor with minimal sugar
- ✴️Can be allergy- or vegan-adapted easily
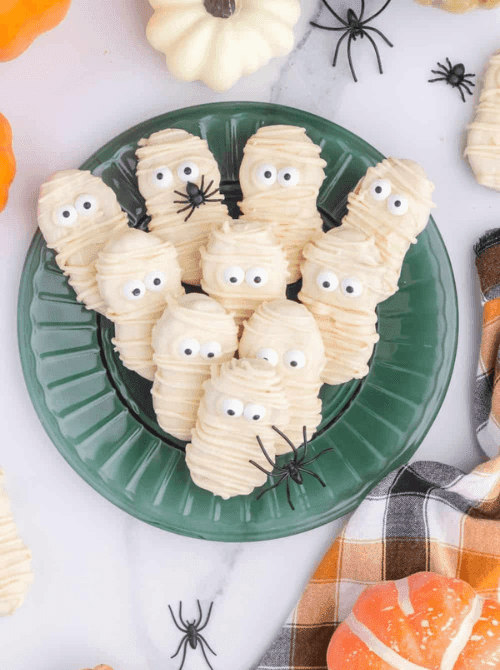
Ghostly & Ghoulish | No-Bake | Fun for Kids
Nutter Butter Mummies are peanut butter cookie sandwiches decorated with white chocolate “mummy wraps” and candy eyeballs. No oven required—just drizzle melted chocolate over the cookies and add the eyes. They’re delightfully spooky and require minimal effort. Perfect for classroom treats or healthy-ish Halloween snack swaps.
- What makes this recipe unique?
Combines classic Nutter Butter cookies with festive mummy styling for a sweet and chewy Halloween treat that’s fun to make. - How easy is this to make?
Very easy—melt, drizzle, and set with minimal steps. Great for kids to help with adult guidance. - How much does it cost to make?
Estimated $5–7 for about 12–16 mummy cookies when using store-brand cookies and melts. - How many servings does this make?
Yields around 12–16 mummy cookies, suitable for small parties or lunchbox treats. - Can I customize or swap ingredients based on allergies or taste?
Yes—use gluten-free peanut butter cookies or seed butter sandwich cookies, dairy-free chocolate melts, or substitute candy eyes for icing dots or mini chocolate chips.
Quick Callouts
- ✴️Easy for kids to DIY
- ✴️Budget-friendly batch for class parties
- ✴️Allergy-friendly with simple swaps
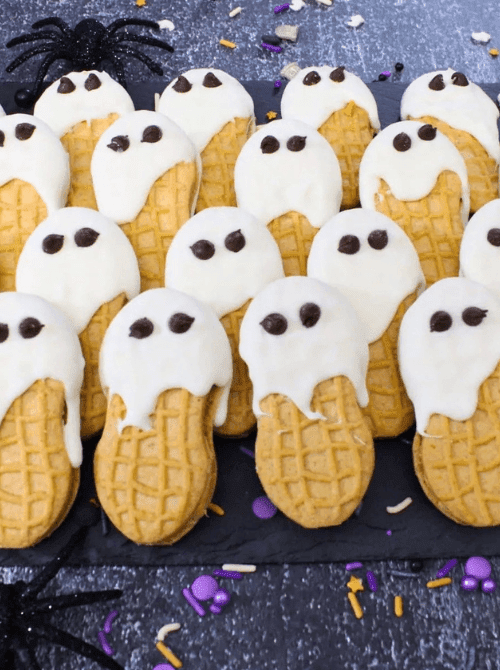
Ghostly & Ghoulish | No-Bake | Quick & Classic
These Nutter Butter Ghosts are peanut butter sandwich cookies dipped in white chocolate and decorated with ghost faces using melted dark chocolate. They’re quick, simple, and festive with just two ingredients and a chill time. The ghost faces are great for personalization or storytelling. A timeless and easy Halloween crowd-pleaser!
- What makes this recipe unique?
Turns classic sandwich cookies into adorable ghost shapes using just a white chocolate dip and simple facial details. - How easy is this to make?
Extremely easy—just dip the cookies and pipe on eyes and mouth. Extremely kid-friendly. - How much does it cost to make?
Roughly $5–7 for about 12 ghosts using store-brand ingredients. - How many servings does this make?
Makes around 12 ghost cookies, perfect for small treat trays or lunchbox-sized portions. - Can I customize or swap ingredients based on allergies or taste?
Yes—use allergy-friendly sandwich cookies, dairy-free melting chocolate, or use edible markers/icing for faces instead of chocolate.
Quick Callouts
- ✴️No bake, minimal prep time
- ✴️Affordable, kid-friendly treat
- ✴️Easy to customize for allergies or preferences
Graveyard Inspired No-Bake Halloween Treats
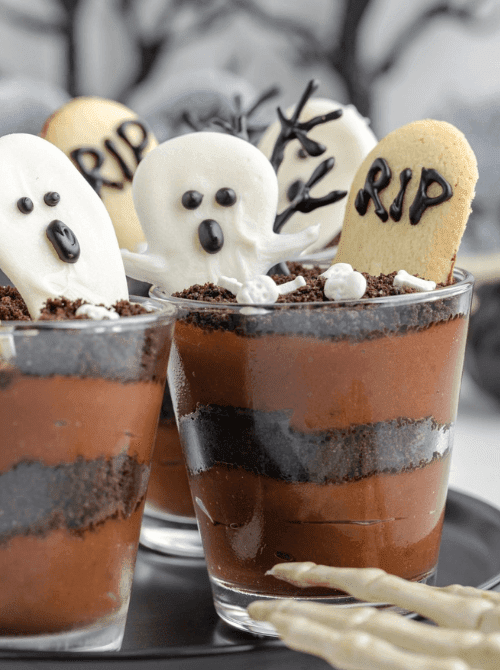
Graveyard-Inspired | No‑Bake | Creepy & Creative
These Halloween graveyard pudding cups layer rich chocolate pudding with crushed cookies to mimic dirt, topped with gummy worms, tombstone cookies, and Halloween sprinkles. They look dramatic but are super simple to assemble—no baking involved. You can make them in clear cups or jars for full visual impact. They’re perfect for class parties or Halloween movie nights.
- What makes this recipe unique?
It creates a spooky mini graveyard in a cup using layered pudding, crushed cookies, and themed toppers—very visual and delightfully eerie. - How easy is this to make?
Very easy—just prepare instant pudding, crush cookies, layer, and decorate. Ideal for beginners or kids to help. - How much does it cost to make?
Estimated $8–10 for six cups (depending on pudding mix and gummy worm brand). Using store-brand pudding and generic cookies can bring that down to $6–7. - How many servings does this make?
Yields around 6 individual pudding cups. Easy to scale up for larger crowds. - Can I customize or swap ingredients based on allergies or taste?
Yes—use dairy‑free pudding mix, gluten-free cookies, or vegan gummy worms. You can swap gummy worms for marshmallows or candy pieces if preferred.
Quick Callouts
- ✴️Kids love mixing in the “dirt”
- ✴️Easy to customize for dietary needs
- ✴️Perfect for party trays or dessert jars
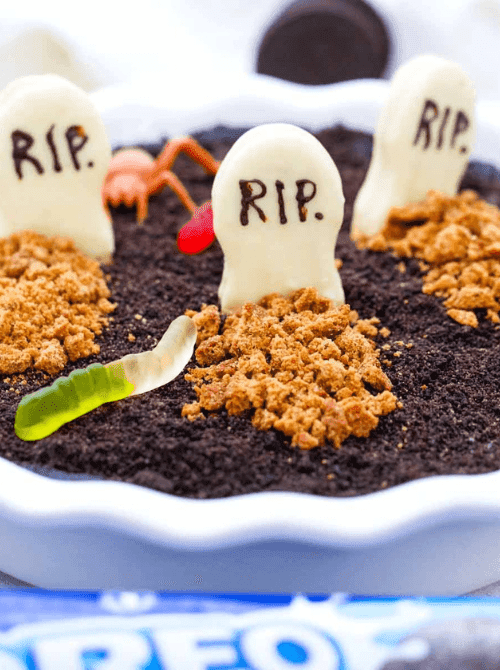
Graveyard-Inspired | No‑Bake | Silky & Spoil-able
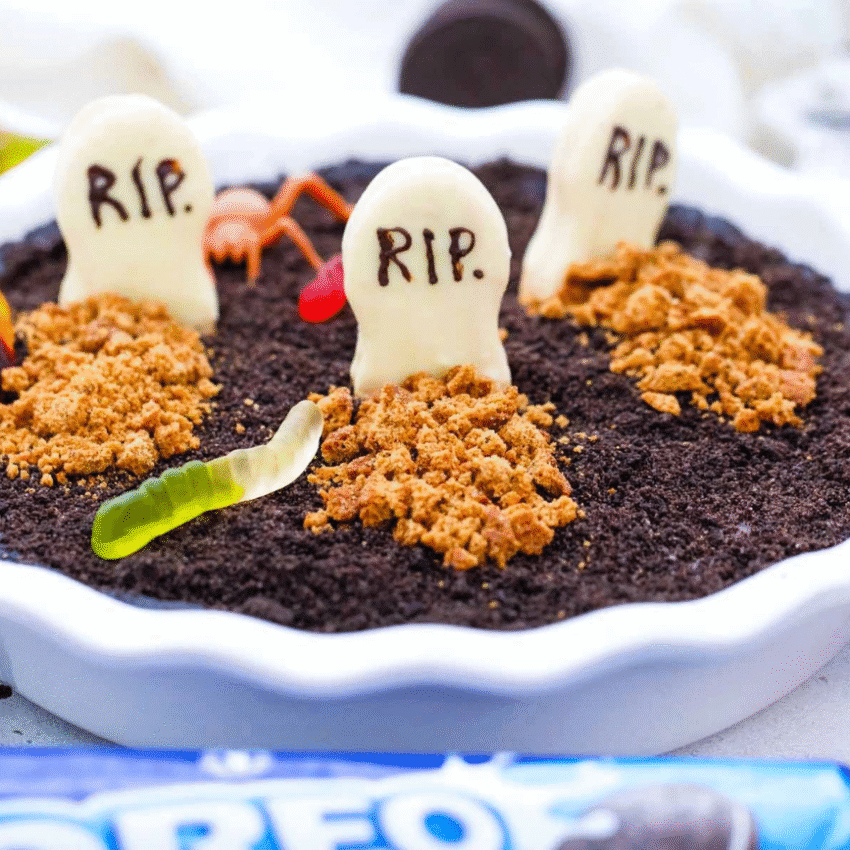
This Oreo Dirt Pie starts with a no-bake Oreo crust made from cookie crumbs and melted butter, then gets layered with rich chocolate pudding, fluffy Cool Whip, and even more crushed Oreos for texture. Topped with gummy worms, candy eyes, and fun graveyard add-ons, it’s spooky, creamy, and surprisingly simple to assemble. You’ll only need a few ingredients, and there’s no oven required—just chilling time to set.
- What makes this recipe unique?
It layers Oreo crumbs three ways: in the crust, folded into the pudding, and as topping—giving it extra crunch and a full-on “dirt” texture that makes every bite fun. - How easy is this to make?
Very easy—melt butter, crush cookies, whisk pudding, and layer. It’s beginner-friendly and requires no baking, just a little chill time. - How much does it cost to make?
Approximately $8–10 for an 8–9″ pan using store-brand pudding, cookies, and Cool Whip. Optional decorations (RIP cookies, candy eyes, plastic spiders) may add $2–3. - How many servings does this make?
Yields about 8–10 servings, depending on portion size. Great for a crowd or potluck-style gathering. - Can I customize or swap ingredients based on allergies or taste?
Yes—use dairy-free pudding and whipped topping, gluten-free Oreos, or skip the decorations for a simpler (but still spooky) version.
Quick Callouts
- ✴️Triple-layered Oreo “dirt” effect
- ✴️Can be made allergy-friendly
- ✴️Fun, spooky presentation for parties
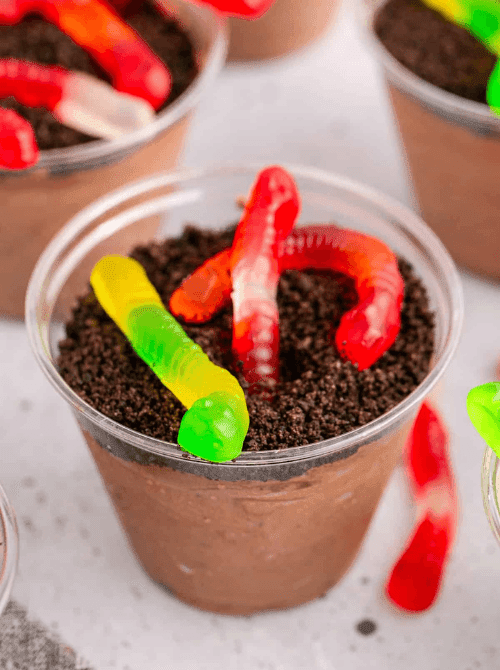
Graveyard-Inspired | No‑Bake | Fun & Gooey
Dirt and Worm Cups are built with layers of chocolate pudding topped with crushed chocolate cookies and gummy worms peeking out—simple yet oh-so-cute. They’re no-bake and built in individual cups for maximum fun and portability. With a playful worm decoration and customizable toppings, these are ideal for kids’ parties or family treats.
- What makes this recipe unique?
The fun gummy worm topping emerging from “dirt” makes these cups playful and interactive—especially fun for little hands. - How easy is this to make?
Very easy—instant pudding and cookie crumbs layered in cups, finished with gummy worms. No baking, minimal tools needed. - How much does it cost to make?
Approximately $6–8 for six cups when using generic pudding and crushed cookies. Bulk gummy worms or store brand reduce cost further. - How many servings does this make?
Makes about 6 individual cups, easy to scale up for a crowd or make smaller mini versions to make it go further for a party. - Can I customize or swap ingredients based on allergies or taste?
Yes—use dairy-free pudding, gluten-free cookies, vegan gummy worms, or substitute candy eyes or marshmallow bits instead of worms.
Quick Callouts
- ✴️Classic dirt cups with playful worm reveal
- ✴️Built in cups for easy serving
- ✴️Customizable with allergy-friendly options
Chocolate-Covered and Candy-Dipped No-Bake Halloween Treats
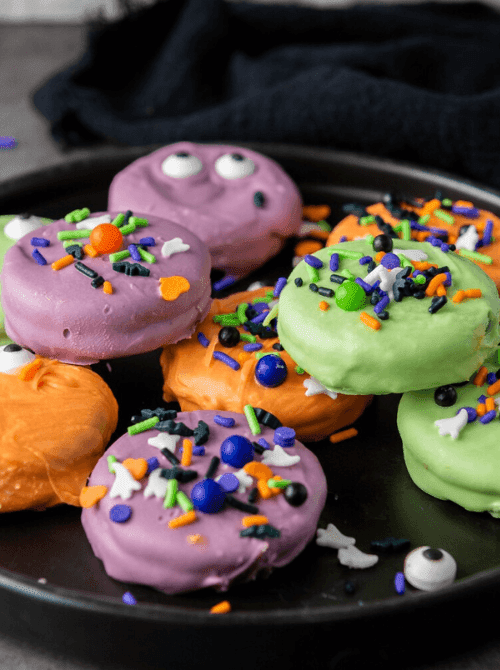
Chocolate‑Covered & Candy‑Dipped | No‑Bake | Festively Colorful
These Halloween-themed Oreos come dipped in vibrant candy melts—orange, purple, and green—and decorated with festive sprinkles and candy eyes to create spooky monster faces. With just melting and dipping, they’re no-bake and quick enough for last-minute projects. The bright colors and fun textures make them a kid favorite and great for gifting or themed treat trays.
- What makes this recipe unique?
A multi-colored approach using different candy melt shades and sprinkles allows you to create a variety of monster-themed Oreos from one base batch. - How easy is this to make?
Incredibly easy—simply melt, dip, sprinkle, and let set. Perfect for helping hands or quick holiday prep with minimal cleanup. - How much does it cost to make?
About $6–8 for 12 cookies, depending on brand of Oreos and candy melts. Buying in bulk or using generic brands reduces cost further. - How many servings does this make?
Makes around 12 decorated Oreos, ideal for sharing or Halloween party treat trays. - Can I customize or swap ingredients based on allergies or taste?
Absolutely—use dairy-free or vegan candy melts, gluten-free Oreos, and choose dye-free or allergy-safe sprinkles and candy eyes.
Quick Callouts
- ✴️Super simple melt-and-dip process
- ✴️Customizable for allergies or preferences
- ✴️Perfect for gifting or themed trays
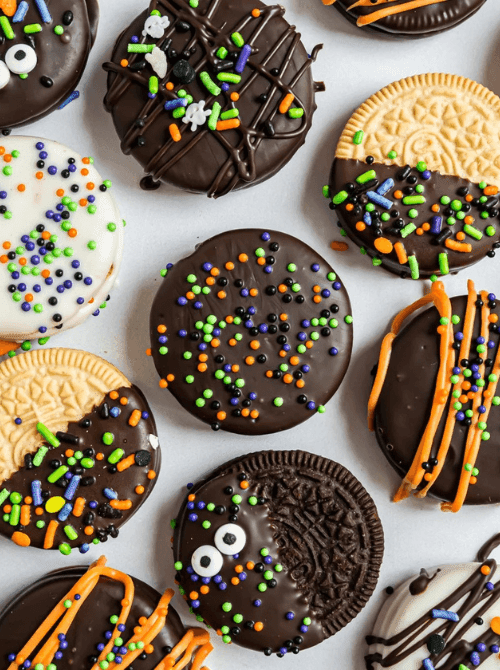
Chocolate‑Covered & Candy‑Dipped | No‑Bake | Simple & Crowd‑Pleasing
This variation features classic Oreos dipped in chocolate or candy melts and topped with spooky Halloween sprinkles or candy eyes. With only three ingredients—Oreos, coated melts, sprinkles—these festive cookies come together quickly. They’re great for filling treat bags, handing out at parties, or assembling with kids. Plus, standard Oreos are nut-free and widely allergy-friendly, making them classroom-safe snacks.
- What makes this recipe unique?
Ultra-simple and festive, using just three ingredients to create spooky treats with a minimal mess and maximum visual impact. - How easy is this to make?
Very beginner-friendly—dip, decorate, and let them set. Even kids can participate in the fun! - How much does it cost to make?
Approximately $5–7 for about 25 cookies, especially using name-brand Oreos and melted coating. Store-brand substitutes can bring this down around $4–5. - How many servings does this make?
Yields about 25 cookies, making it ideal for a classroom or party platter. - Can I customize or swap ingredients based on allergies or taste?
Yes—choose gluten-free or vegan Oreos, use dairy-free chocolate, and swap sprinkles for candy eyes or icing dots as needed.
Quick Callouts
- ✴️Only 3 ingredients needed
- ✴️Nut-free base makes them school-safe
- ✴️Easily customized for dietary needs
Serving & Display Ideas on a Budget
Try these unique, budget-conscious setup ideas that go beyond the usual plastic spiders and paper plates but are using items you most likely already have at home.
- Use a black or white bedsheet as a tablecloth
- Skip the themed tablecloths and use a twin-size bedsheet or curtain panel as your base. Add some crumpled cheesecloth, gauze, or tissue paper on top for texture that looks like cobwebs.
- Repurpose jars and glasses for themed holders
- Mason jars, wine glasses, or empty salsa jars make great holders for pudding cups, pretzel rods, or chocolate-dipped Oreos. Wrap them with painter’s tape or a bit of ribbon in black, orange, or purple for a festive touch.
- Label each treat with a theme name
- Use toothpicks or craft sticks and sticky labels to name your treats: “Monster Bites,” “Witch Wands,” or “Graveyard Dirt Cups.” This makes everything look more intentional—even if it’s all store-bought!
- Use pumpkins or produce as props
- Mini pumpkins, squash, or even a pile of apples can act as filler between platters. Stack them or scatter them for a seasonal look—no need to carve or decorate them.
- Add height with boxes under the tablecloth
- Flip over boxes or Tupperware containers and cover them with your tablecloth to create different levels. Place lighter treats like cookies or popcorn mixes on top to build a more dynamic display.
$25 Halloween Treat Menu (No-Bake, Budget-Friendly, Ingredient-Smart)
This party menu includes 4 fun recipes, enough to fill a treat table or snack tray for 12–15 people—all while sticking to a $25 budget.
💡 A Quick Note on Pricing:
Prices listed are accurate as of 2025 and based on budget-friendly stores like Dollar Tree, Walmart, or Target’s seasonal section. With supply chains and import costs always shifting, actual prices may vary slightly depending on your location or store availability. The good news? Most of these items can be swapped or simplified—so your setup stays festive without going over budget.
MENU OVERVIEW:
- Chocolate-Covered Halloween Dipped Oreos
- Oreo Cookie Spiders and Bats
- Nutter Butter Ghosts
- Halloween Graveyard Pudding Cups
Combined Grocery List with Estimated Prices
| Ingredient | Use in Recipe(s) | Approx. Cost |
|---|---|---|
| 1 pack Oreo cookies (family size) | Dipped Oreos + Spiders/Bats + Graveyard | $3.50 |
| 1 pack Nutter Butters | Nutter Butter Ghosts | $2.50 |
| 1 bag white candy melts | Ghosts + Dipped Oreos | $3.50 |
| 1 bag dark or milk chocolate chips | Spiders/Bats (melting) | $2.50 |
| 1 instant chocolate pudding mix (x2) | Graveyard Pudding Cups | $2.00 |
| 1 tub whipped topping (store-brand) | Optional: fold into pudding for fluffier base | $1.25 |
| 1 small tub gummy worms | Graveyard Cups | $1.50 |
| 1 bag candy eyes (bulk or store-brand) | Ghosts + Dipped Oreos + Spiders | $3.00 |
| 1 sleeve graham crackers or Milano cookies | Graveyard “tombstones” | $1.75 |
| Optional: Sprinkles (small bottle) | Dipped Oreos | $1.50 |
🟠 Estimated Total: $23.00–$25.00
(Depending on store brand, bulk items, and use of pantry staples like milk)
Why This Works:
- Oreo cookies are used in 3 recipes (Dirt cups, dipped cookies, and spider bases)
- Candy eyes and candy melts go across multiple treats, saving money
- Pudding & gummy worms use up a whole box/bag—no waste
- No baking required, and everything can be made ahead
Portion Estimate:
- 6–8 pudding cups
Enough for a small party, potluck table, or Halloween snack night with leftovers! - 12–16 dipped Oreos
- 10–12 spider or bat cookies
- 12 ghost cookies
Halloween Party Setup for Under $25
If you need a few additional items to complete your party setup, here’s how to build a festive Halloween spread for under $20—without sacrificing style or fun. With a little creativity (and a few smart dollar store finds), you can build an entire treat table setup for less than $25.
What to Buy for Under $25
- Halloween napkins or plates – $1.50–$2.00
- Candy eyes or specialty sprinkles – $3.50–$4.00
- Treat bags (25 ct) – $1.75–$2.50
- Spider webbing or cheesecloth – $1.75
- Halloween stickers or labels – $1.50
- Plastic spiders or mini decor – $1.75–$2.00
- Festive candy (bulk) – $5.50–$6.50
- Ribbon spool (black or orange) – $1.50
- Tent cards or craft sticks – $1.50–$2.00
- Disposable trays or cups (if needed) – $4.00–$5.00
Final Thoughts: No-Bake Halloween Treats
Every Halloween, I find myself wanting to bring something festive to the table—but not at the cost of my entire evening or half my kitchen. That’s why I always come back to no-bake treats. They’re quick, playful, and still feel like you made an effort (even if they only took 15 minutes and one bowl).
These recipes are proof that you don’t need themed bakeware, hours of prep, or a Pinterest-perfect plan to show up with something fun. A few simple ingredients, a little decorating, and suddenly you’ve got ghost cookies, candy-dipped monsters, and pudding cup graveyards that everyone wants to try.
Whether you’re hosting a casual get-together or just want to bring a little spooky cheer without overcommitting, these no-bake ideas keep things festive, affordable, and totally doable.



1 thought on “Super Easy No-Bake Halloween Treats for a Party”
Comments are closed.