Creamy, crowd-pleasing, and almost too cute to eat.
Easter morning is a beautiful kind of chaos. You’ve got a ham in the oven, the kids are already bouncing off the walls on a chocolate high, and you’re trying to pull together a spread that looks like you actually have it together — without blowing your grocery budget before April has really begun.
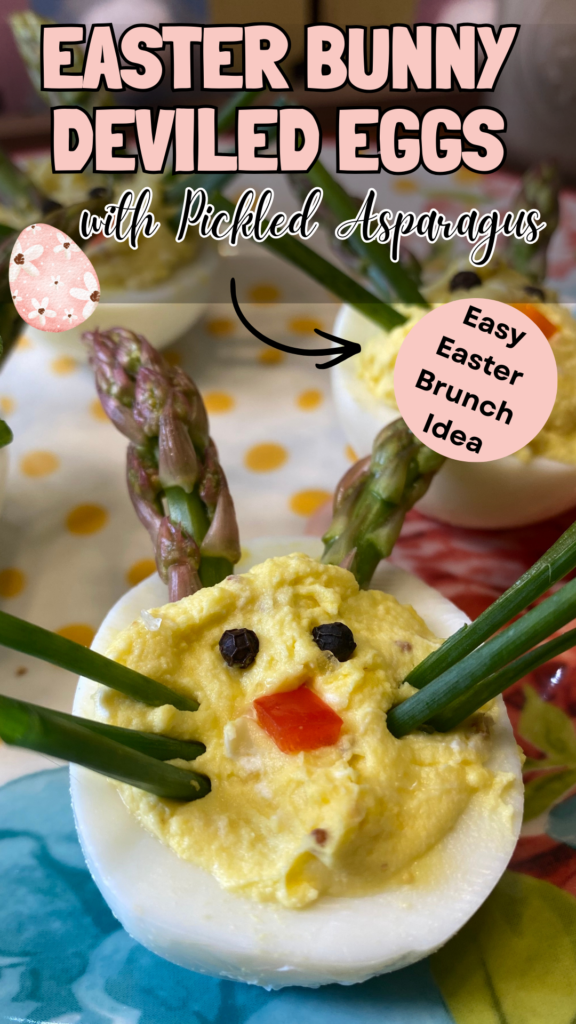
These Easter Bunny Deviled Eggs are your answer.
These aren’t your standard deviled eggs. The filling is made with a cream cheese base that makes it noticeably silkier than the classic mayo-only version, balanced with a touch of honey and pickle juice for the perfect mix of tang and creaminess. And the presentation? Shape them into adorable little bunnies with pickled asparagus spears for ears and black peppercorns for eyes, and they go from “nice appetizer” to the most talked-about dish on the table — now that egg prices are finally coming back down, there’s never been a better time to make deviled eggs the star of your Easter spread.
This is the kind of recipe that looks like a Pinterest project but comes together in under 35 minutes. It’s the perfect Easter appetizer for holiday brunch, spring potlucks, or any gathering where you want to show up with something that feels genuinely special. Approachable, budget-friendly, and almost too cute to eat.
✨ Transparency Matters
Some links in this post may be affiliate links. That means I may earn a small commission — including as an Amazon Associate — at no extra cost to you.
Most deviled egg recipes stop at mayo and mustard. This one goes further with a cream cheese base that makes the filling noticeably silkier, and a touch of honey and pickle juice that balances the richness with a little tang and sweetness.
The bunny decoration isn’t just cute — it’s actually pretty simple. All you need is a zip-lock bag with the corner snipped unless you want to invest in a professionalpiping bag. The ears are just pickled asparagus tips that you can make homemade using a quick pickled recipe or buy pre-pickled if you’re short on time. The whole thing comes together faster than you’d think.
It’s also a recipe that scales beautifully. Double it for a larger crowd — the filling is forgiving and stores well in the fridge in an airtight container until you’re ready to plate.
Quick Snapshot
🕒Ready In: 35 minutes
🍽️Serves: 12
💸Budget Level:Low — under $8 if making the pickled asparagus yourself
❄️Freezer Friendly: No — best served fresh or within 24 hours
🎉Best For: Easter brunch, spring parties, holiday entertaining, potlucks
Ingredients You’ll Need
Here’s what goes into the filling and the decorations. Most of it is probably already in your pantry.
FOR THE FILLING:
6 large eggs
3 tbsp mayonnaise
2 tbsp cream cheese, softened
1 tsp Dijon mustard
1 tsp pickle juice
½ tsp honey
Salt and pepper to taste
FOR THE BUNNY DECORATIONS:
12 pickled asparagus spears tips (for the ears)
1 red or orange banana pepper, chopped small (for the nose)
12 black peppercorns (for the eyes)
4–5 chives, cut into 1″ strips (for whiskers)
💡
Tip: Can’t find pickled asparagus? Check the specialty foods aisle or grab them online
here. They’re worth having on hand for charcuterie boards too.
How to Make It
Step 1: Hard Boil the Eggs
Place your 6 eggs in a saucepan and cover with cold water by about an inch. Bring to a full boil over medium-high heat, then cover the pot and remove it from the heat entirely. Let the eggs sit undisturbed for 12 minutes. This method gives you a fully cooked yolk without that gray ring.
Step 2: Cool and Peel
While the eggs are sitting, fill a bowl with ice water. After 12 minutes, transfer the eggs directly into the ice bath for at least 5 minutes. This stops the cooking and makes peeling dramatically easier. Peel gently under cold running water and pat dry with a paper towel.
Step 3: Prepare the Egg Whites
Slice each egg in half lengthwise. Pop the yolks out into a mixing bowl. Arrange your egg white halves on your serving tray or deviled egg platter — ideally one with built-in cups so they don’t slide around.
Step 4: Make the Filling
Using a fork, mash the yolks until they’re fine and crumbly — no big lumps. Add the mayo, softened cream cheese, Dijon, pickle juice, honey, salt, and white pepper. Mix until the filling is very smooth and creamy. It should be light and almost fluffy. Taste it and adjust: a little more pickle juice for tang, a drizzle more honey if you want to soften the edge.
A hand mixer makes the filling even smoother if you want to go the extra mile.
Step 5: Fill the Eggs
Transfer your filling to a piping bag or a zip-lock bag with one corner snipped. Pipe the filling into each egg white half generously — a nice mound looks more impressive than a flat fill.
Step 6: Add the Bunny Ears
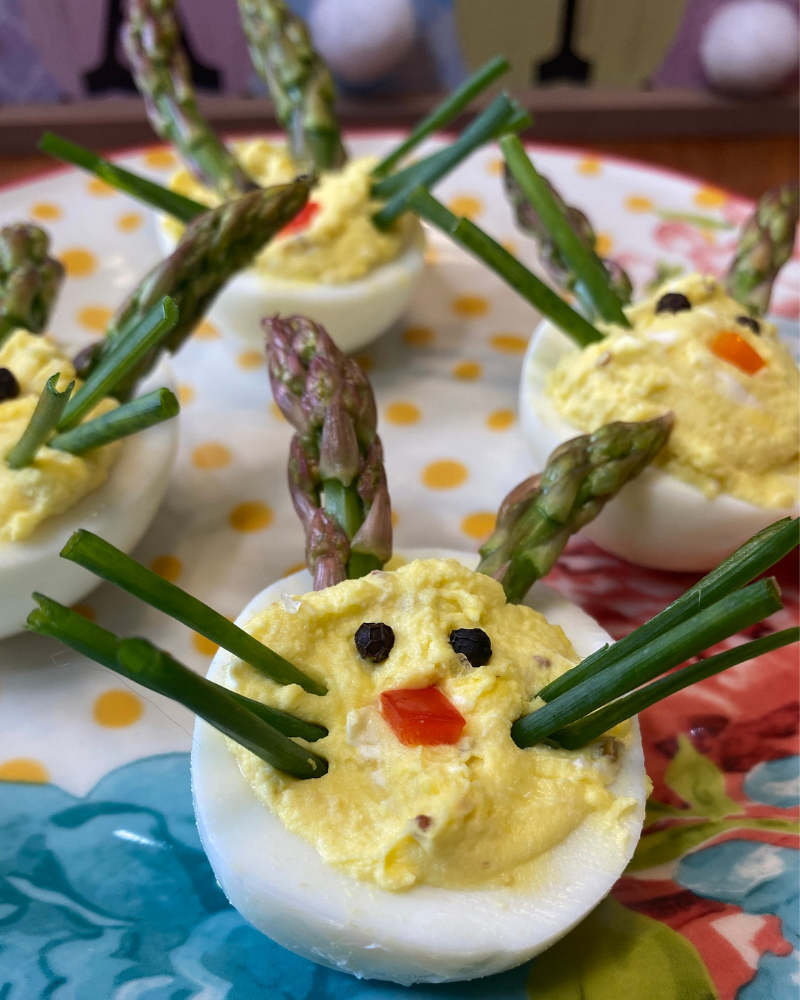
Cut the tops of your pickled asparagus spears to create pointed ear shapes. Press two pieces gently into the top of each filled egg. They should stand up on their own if you angle them slightly outward — like a bunny mid-hop.
Step 7: Add the Face Details
Press 2 black peppercorns into each egg for the eyes. Chop a small square of banana pepper and place it just below center for the nose. Cut chives into 1-inch pieces and press them in horizontally for whiskers — three per side is the sweet spot. If they are thicker you can slice in half before adding.
Step 8: Serve or Chill
Serve immediately, or cover loosely and refrigerate on your serving tray until ready. If refrigerating, add the whiskers and nose right before serving so they stay fresh and perky.
Ingredient Substitutions
This recipe is forgiving. Here’s how to adapt it based on what you have:
Missing cream cheese? Use an extra tablespoon of mayo and a spoonful of Greek yogurt for creaminess with a little tang
Missing Dijon? Yellow mustard works fine — just use slightly less since it’s sharper
Missing pickle juice? A squeeze of lemon juice or a splash of apple cider vinegar gives you that same brightness
Missing pickled asparagus? Use thin slices of the banana pepper cut into ear shapes
Missing banana pepper? Any small mild pepper works — even finely diced red bell pepper for color
Missing chives? Thin green onion strips or small sprigs of fresh dill make great whisker alternatives
Budget-Friendly Tips
This recipe is already very affordable, but here’s how to stretch it even further:
A 12-count carton of large eggs typically runs $2–$4. That gives you 24 egg halves from one batch — enough for a crowd at under $0.50 per serving
Buy cream cheese in bulk — it freezes well and shows up in everything from dips to pasta sauces
Pickle juice is free if you’ve already got a jar of pickles in your fridge. Don’t throw it out — it’s liquid gold in recipes like this
Whole peppercorns last forever in a spice jar and cost pennies per use
Chives are cheap fresh or easy to grow in a small herb pot on the windowsill — one of the best low-effort kitchen upgrades
Estimated cost per batch (12 halves): $6–$8 depending on your grocery store and what you already have.
Stretch It Further
Love the filling? Make some extra and try out the ideas below:
Spread it on crackers or cucumber rounds as a quick snack
Use it as a sandwich spread — it’s basically an elevated egg salad
Stuff it into halved cherry tomatoes for a second appetizer with zero extra work
Mix a spoonful into pasta salad for creamy, protein-packed flavor
If you have extra hard-boiled eggs, chop them and toss with the leftover filling for a quick egg salad that’s ready for lunch sandwiches the next day.
Serving Suggestions
Arrange on a tiered serving stand for a dramatic Easter brunch display
Pair with a spring charcuterie board featuring smoked meats, fresh veggies, and seasonal dips
Set out on an egg platter with a lid for easy transport to potlucks or family gatherings
Serve alongside a light green salad and ham biscuits for a complete Easter spread
🎉
Hosting tip: A
deviled egg carrier with a lid keeps these safe during transport and looks put-together when you arrive. Way better than plastic wrap.
Make-Ahead & Storage
These are a great make-ahead appetizer with one rule: keep the components separate and do the final prep right before serving.
Hard boil the eggs up to 3 days in advance and store them unpeeled in the fridge
Make the filling up to 24 hours ahead and store in an airtight container or piping bag in the fridge
Assemble the filled eggs up to a few hours before serving — cover loosely with plastic wrap or use a deviled egg tray with cover to keep them fresh
Add the bunny face decorations (nose, eyes, whiskers) right before serving for the freshest look
Do not freeze assembled deviled eggs — the texture of the egg whites suffers badly
Pro Tips
Older eggs peel more easily than fresh ones. If your eggs are brand new from the store, use them for something else and save older eggs for hard boiling
The ice bath is not optional — it stops the cooking and prevents that green-gray ring around the yolk
For the smoothest filling, let the cream cheese come to room temperature before mixing. Cold cream cheese = lumpy filling
A fine mesh strainer or a potato ricer pushed over the yolks gives you an ultra-smooth base if you want to take the extra step
Press the asparagus ears in at a slight outward angle — straight up looks flat; angled looks like a real bunny
Make more than you think you need. These disappear fast.
Variations to Try
Want to mix it up or expand to other occasions? The base recipe can be used as a start to create all kinds of ideas. Here are a few to get you started!
Spicy Bunny Eggs: Add a dash of hot sauce or a small slice of jalapeño to the filling. Use the jalapeño for the nose instead of banana pepper
Bacon Deviled Eggs: Crumble crispy bacon into the filling or use it as a garnish topping
Avocado Deviled Eggs: Swap half the mayo for mashed avocado and add a squeeze of lime for a creamy, green-tinted filling
Everything Bagel Style: Top with everything bagel seasoning and a thin slice of smoked salmon instead of bunny faces — great for adults
Final Thoughts
I believe that impressive food doesn’t require an impressive budget. It just requires a little intention.
A carton of eggs, some pantry staples, a handful of garnishes — and suddenly you’ve got a platter of tiny bunny faces that stops people in their tracks before they’ve even picked one up. That’s the whole magic of this Easter Bunny Deviled Eggs recipe. It’s not complicated. It’s just impressive.
Make them for Easter brunch. Bring them to a spring potluck. Make them on a random Sunday because you have eggs and a free hour and that’s reason enough. However they end up on your table, the cream cheese filling is rich enough to feel special, the bunny details are just fussy enough to feel intentional, and the whole thing costs less than eight dollars.
That’s a pretty good deal for something people will actually remember. 🐣
Made these? Save this recipe and tag me — I want to see your bunnies!
Easter Bunny Deviled Eggs
These Easter Bunny Deviled Eggs are a creamy, crowd-pleasing spring appetizer made with a silky cream cheese filling and decorated with asparagus ears, chive whiskers, and peppercorn eyes. Ready in 35 minutes, budget-friendly, and almost too cute to eat.
1red or orange banana pepperchopped small (for the nose)
12black peppercornsfor the eyes
12chivescut into 1″ strips (for whiskers)
Get Recipe Ingredients
Instructions
Step 1: Hard Boil the Eggs
Place your 6 large eggs in a saucepan and cover with cold water by about an inch. Bring to a full boil over medium-high heat, then cover the pot and remove it from the heat entirely. Let the eggs sit undisturbed for 12 minutes. This method gives you a fully cooked yolk without that gray ring.
6 large eggs
Step 2: Cool and Peel
While the eggs are sitting, fill a bowl with ice water. After 12 minutes, transfer the eggs directly into the ice bath for at least 5 minutes. This stops the cooking and makes peeling dramatically easier. Peel gently under cold running water and pat dry with a paper towel.
Step 3: Prepare the Egg Whites
Slice each egg in half lengthwise. Pop the yolks out into a mixing bowl. Arrange your egg white halves on your serving tray or deviled egg platter — ideally one with built-in cups so they don't slide around.
Step 4: Make the Filling
Using a fork, mash the yolks until they're fine and crumbly — no big lumps. Add the 3 tbsp mayonnaise, 2 tbsp cream cheese, 1 tsp Dijon mustard, 1 tsp pickle juice, ½ tsp honey, Salt, and white pepper. Mix until the filling is very smooth and creamy. It should be light and almost fluffy. Taste it and adjust: a little more pickle juice for tang, a drizzle more honey if you want to soften the edge.
3 tbsp mayonnaise, 2 tbsp cream cheese, 1 tsp Dijon mustard, 1 tsp pickle juice, ½ tsp honey, Salt
Step 5: Fill the Eggs
Transfer your filling to a piping bag or a zip-lock bag with one corner snipped. Pipe the filling into each egg white half generously — a nice mound looks more impressive than a flat fill.
Step 6: Add the Bunny Ears
Cut the tops of your 12 pickled asparagus spears tips to create pointed ear shapes. Press two pieces gently into the top of each filled egg. They should stand up on their own if you angle them slightly outward — like a bunny mid-hop.
12 pickled asparagus spears tips
Step 7: Add the Face Details
Press 12 black peppercorns into each egg for the eyes. Chop a small square of 1 red or orange banana pepper and place it just below center for the nose. Cut 12 chives into 1-inch pieces and press them in horizontally for whiskers — three per side is the sweet spot. If they are thicker you can slice in half before adding.
1 red or orange banana pepper, 12 black peppercorns, 12 chives
Step 8: Serve or Chill
Serve immediately, or cover loosely and refrigerate on your serving tray until ready. If refrigerating, add the whiskers and nose right before serving so they stay fresh and perky.
Notes
Storage: Assembled eggs keep in the fridge for up to 24 hours. Add the whiskers and nose just before serving for the freshest look.Make Ahead: Hard boil the eggs up to 3 days in advance. The filling can be made up to 24 hours ahead and stored in an airtight container or piping bag in the fridge.Peeling Tip: Older eggs peel more easily than fresh ones. The ice bath is non-negotiable — it stops the cooking and makes peeling significantly easier.
Filling Tip: Let the cream cheese come to room temperature before mixing. Cold cream cheese makes the filling lumpy instead of smooth.Decoration Tip: Press the asparagus ears in at a slight outward angle — straight up looks flat; angled looks like a real bunny.Scaling: This recipe doubles easily. The filling is forgiving and the decoration time is the only thing that scales with the batch size.
To provide the best experiences, we use technologies like cookies to store and/or access device information. Consenting to these technologies will allow us to process data such as browsing behavior or unique IDs on this site. Not consenting or withdrawing consent, may adversely affect certain features and functions.
Functional
Always active
The technical storage or access is strictly necessary for the legitimate purpose of enabling the use of a specific service explicitly requested by the subscriber or user, or for the sole purpose of carrying out the transmission of a communication over an electronic communications network.
Preferences
The technical storage or access is necessary for the legitimate purpose of storing preferences that are not requested by the subscriber or user.
Statistics
The technical storage or access that is used exclusively for statistical purposes.The technical storage or access that is used exclusively for anonymous statistical purposes. Without a subpoena, voluntary compliance on the part of your Internet Service Provider, or additional records from a third party, information stored or retrieved for this purpose alone cannot usually be used to identify you.
Marketing
The technical storage or access is required to create user profiles to send advertising, or to track the user on a website or across several websites for similar marketing purposes.